


Foil Art
Silversmithing has long been an important art form in the American West, from the spurs and saddle ornamentation of cowboys to cuffs and other jewelry of Southwest Native American groups.
Since you may not have sheets of silver lying around, aluminum foil acts as a good substitute.
Materials
- Piece of cardboard
- Glue (hot glue or white glue)
- Aluminum foil – cut into sheets sized to cover one side of the cardboard and wrap around to the back
- Tape
- Cotton balls
- Colored Sharpies
Instructions
- Get a small piece of cardboard. Any cardboard. It can be a piece of a shipping box or cereal box.
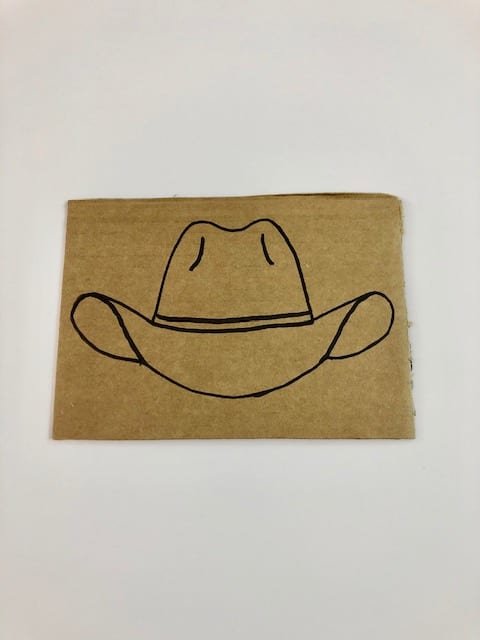
- Choose a simple image for your foil art. Something with simple lines.
- You can draw your image freehand onto your cardboard, or print out a picture from online, cut it out and trace it on the cardboard (be sure to add in any interior lines). A few samples can be found here.
- Overlay the outline with glue and let it dry completely
- Notes on glue:
- White Elmer’s glue leaves a smoother line. However, as it dries it will flatten out substantially to the point where it may not leave enough of a ridge. You may need to go back over it a second time after it dries. It also takes a long time to dry.
- Hot glue dries faster and leaves a good ridge the first time.
- Notes on glue:
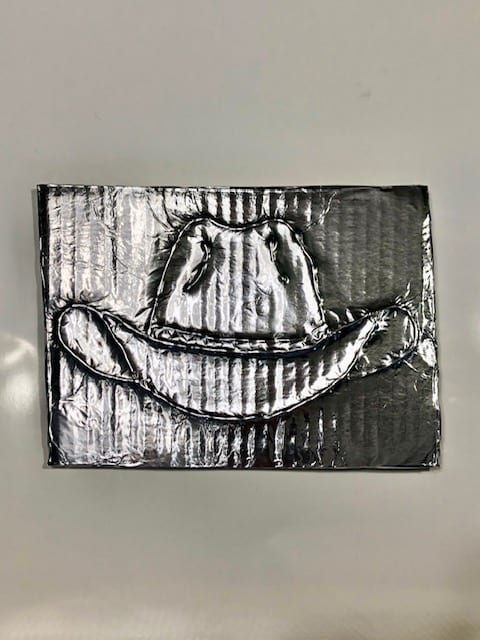
- Apply glue (white glue or gluestick) on the cardboard around the image to help the foil stick to it.
- Place a piece of foil over the cardboard and wrap it tightly around to the back. Use a few pieces of tape to secure it.
- Take a cotton ball and rub the face of the canvas to press the foil down and stick to the glue. Rub around the lines of the image so it shows clearly through the foil.
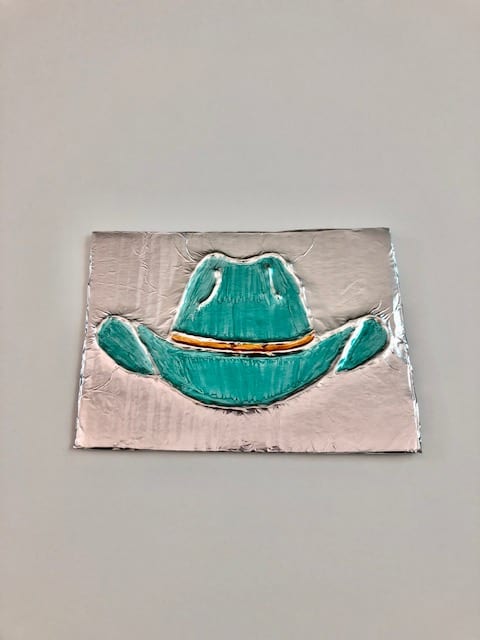
- Once the image is clearly visible you can leave it as it is, or use the colored Sharpies to decorate it (regular non-permanent markers won’t stick to the foil and will just rub off).